Creating a challenge
A well-designed challenge motivates people to stay active. That’s why YuMuuv allows you to choose between different types of challenges. Let’s create your next one.
Table of Contents
1. Create a challenge
You should go to the Challenges page and create a new challenge by selecting Create.

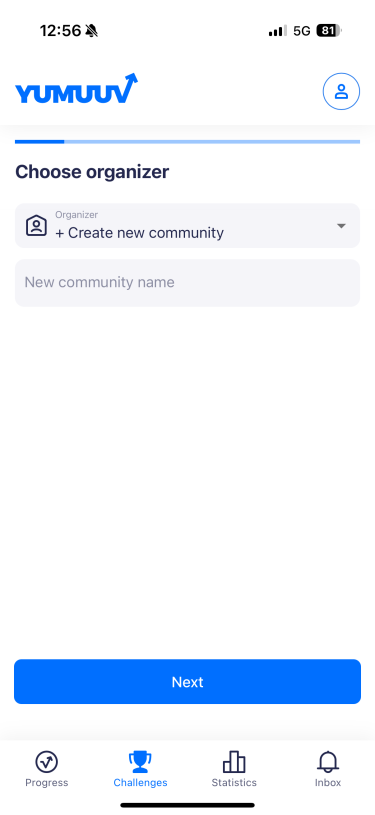
2. Choose organizer
After that you will see a list of companies you're related to. Only users with admin rights can create company-wide challenges.
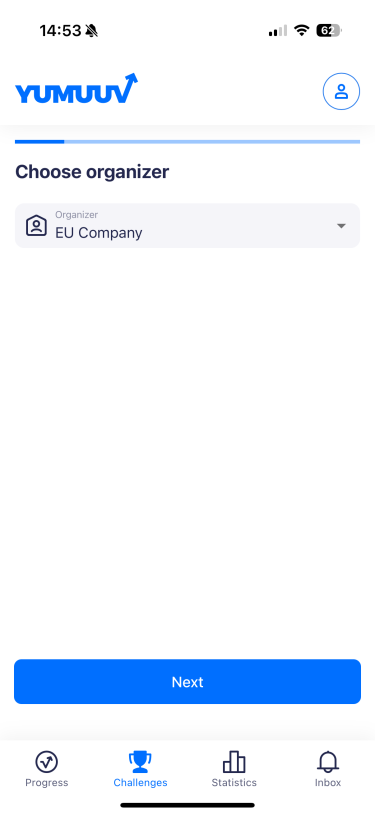
Other users can create private challenges and invite up to 10 participants, including individuals outside the company, such as family members or friends. To create a private challenge, you must first create a private community.
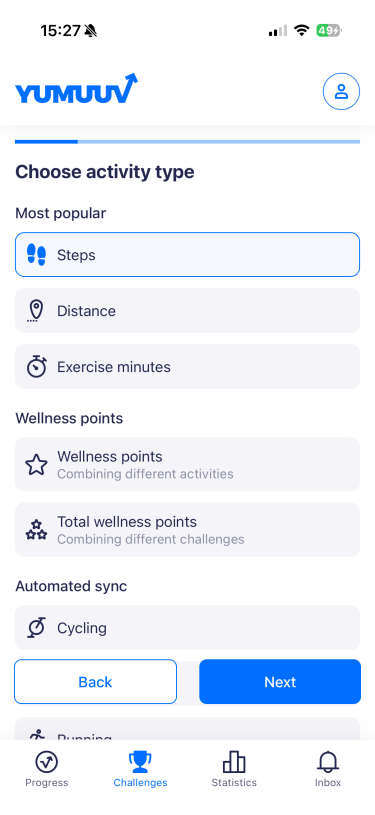
3. Choose activity type
Then you’ll choose the activity type for your challenge. The list includes both automated sync challenges and manual entry challenges. If you scroll to the bottom, you’ll find a custom option to create a challenge for an activity not included in the list (custom activities are only manual entry based).
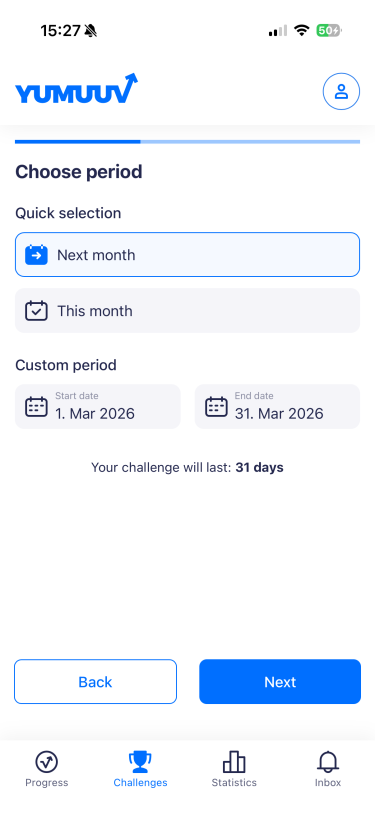
4. Choose period
Now you can choose your challenge's period. You can select from the following options:
Next Month: automatically sets the challenge for the entire next calendar month.
This Month: automatically sets the challenge for the current calendar month.
Custom Period: allows you to manually specify a start and end date to fit your needs. The app will display the total duration of the challenge in days based on the selected dates.
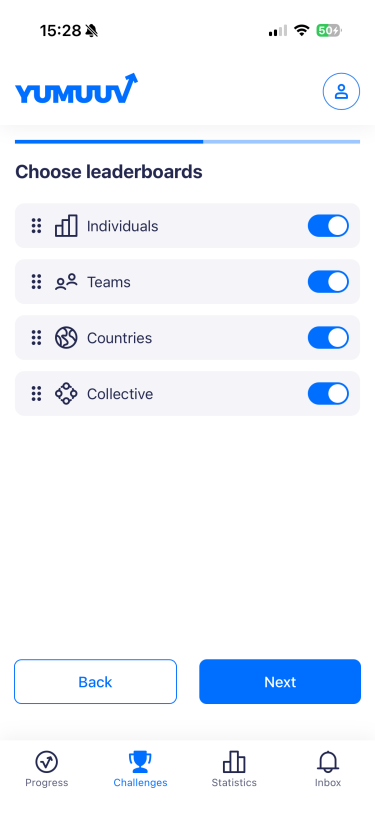
5. Choose leaderboards
In the next step, choose which leaderboards you would like to display during the challenge. If you have created multiple groups, they will be visible here, and you can select which leaderboards to include in this specific challenge. You can change the order of the leaderboards by dragging them using the six-dot drag handle on the left side.
Individual leaderboard - all the users will see the ranking with all the participants.
Team leaderboard - participants who join a team will contribute to their team’s overall results. The leaderboard displays the rankings of all teams.
Country leaderboard - basically the same as with teams, but people are grouped up with people from the same country.
Collective leaderboard - if you want to have a collective goal, you can toggle on the Collective option. In the leaderboard you will see the names of the participants and how many steps, minutes, etc. (depending on the activity type the challenge is for) they have accumulated.
6. Choose challenge type
There are two different types you can choose from (and later define the target amount for).
Total target: progress is based on the total amount accumulated over the whole challenge period. All results for the selected unit are summed up.
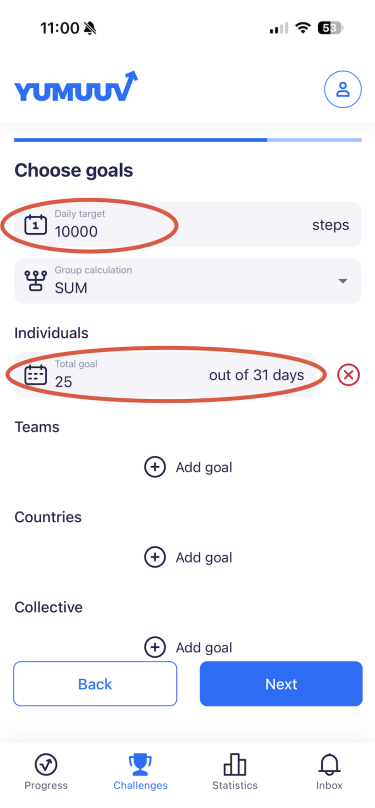
Daily target: progress is based on how many days a defined daily goal is reached or exceeded. Results are calculated from the number of days the daily goal is met.

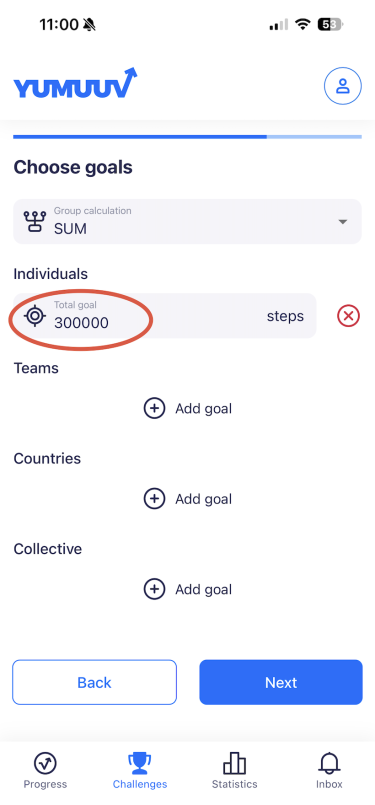
7. Choose goals
Now that the type is chosen, it’s time to define challenge goals based on the leaderboards you selected. Setting a goal for every leaderboard is not required. You can still track and compare results even if no specific goal has been defined.
Group calculation
In this step, you can decide how results are calculated for group-based leaderboards (such as Teams, Countries, or custom groups created by the admin).
You can choose between:
-
SUM – The total result of all group members is added together.
-
AVG (Average) – The group’s result is calculated as the average of all members’ results.
This setting only affects group leaderboards and does not impact individual results.
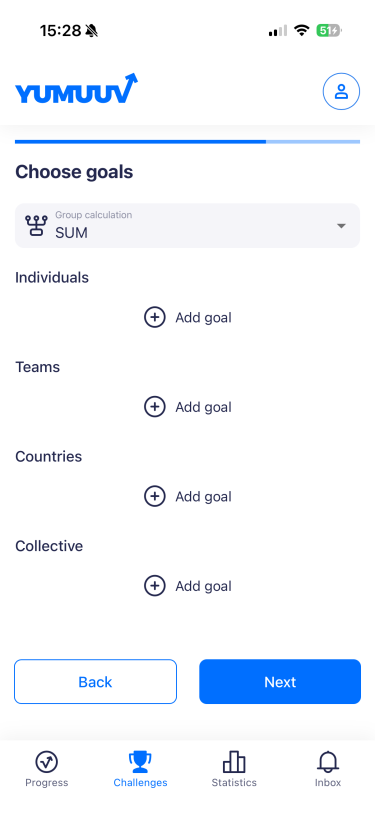
You can now add a goal to your preferred leaderboard(s) by clicking the Add goal button and entering the target number.
7.1. Total target
If you select Total target as the challenge type, you can set an individual goal that participants must reach by the end of the challenge period.
7.2. Daily target
If you select Daily target as the challenge type, participants work toward reaching a defined daily goal, and results are calculated based on how many days the goal is met.
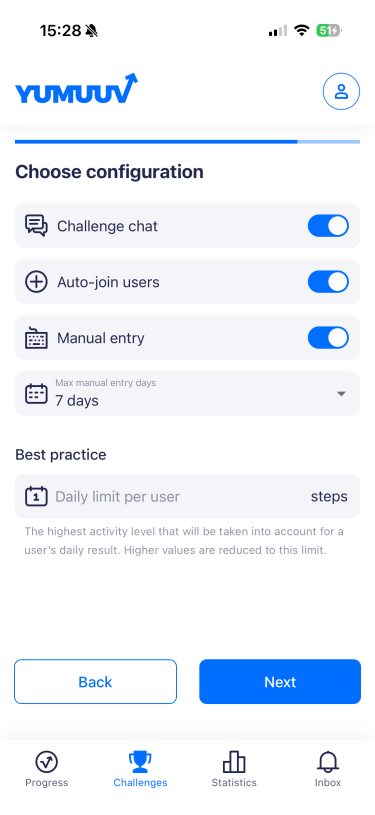
8. Choose configuration
Challenge chat - under each challenge, there's an option to have a chat. There's no "big" chat for all the users under your company, but each challenge has its own for its participants.
Auto-join users - if it is on, all users under your system will be automatically added to this challenge. If it is off, each user can decide whether they want to join the challenge.
Manual entry - for automated sync challenges, you also have the option to allow manual data entry, which gives users the option to manually enter their data into the challenge if they wish.
Max manual entry days - if you enable manual entry, you can specify how many days participants can go back to add their data.
Daily limit per user - if desired, you can also set a daily limit per user. For example, if you create a step challenge and set the daily limit to 20,000 steps, users can still take more steps per day, but any steps exceeding the limit will not be counted toward their daily result or reflected in the leaderboard.
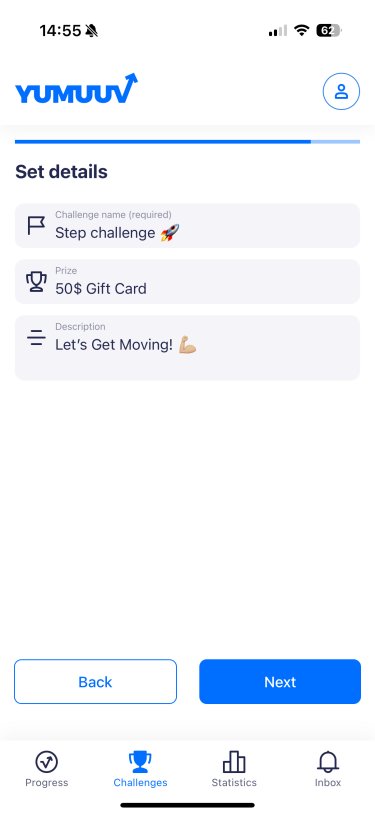
9. Set details
Now that all the technical decisions are finalized, it’s time to set the final details. Choose a name for your challenge, add a prize if applicable, and write a description to guide and motivate participants (not mandatory).
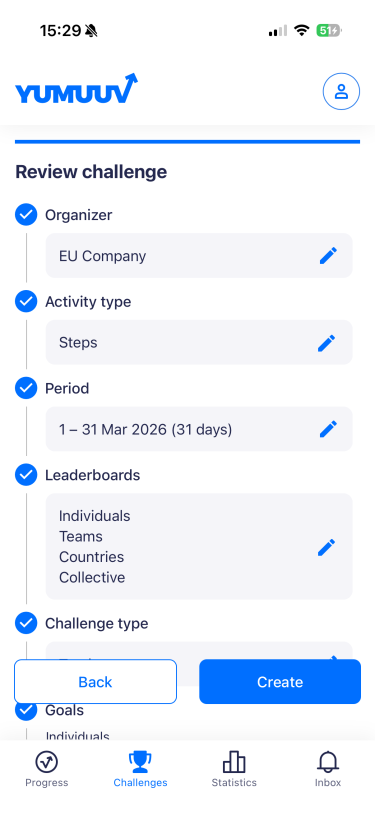
10. Review challenge
Everything is set! Take a final look to ensure everything is correct. If it is, click Create. Congratulations on creating your new challenge!
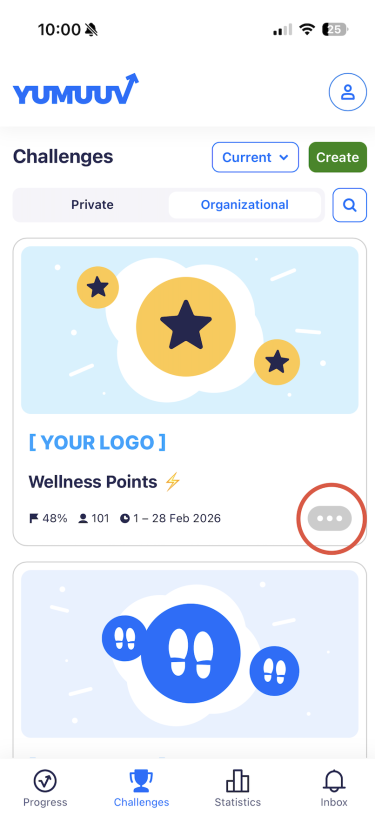
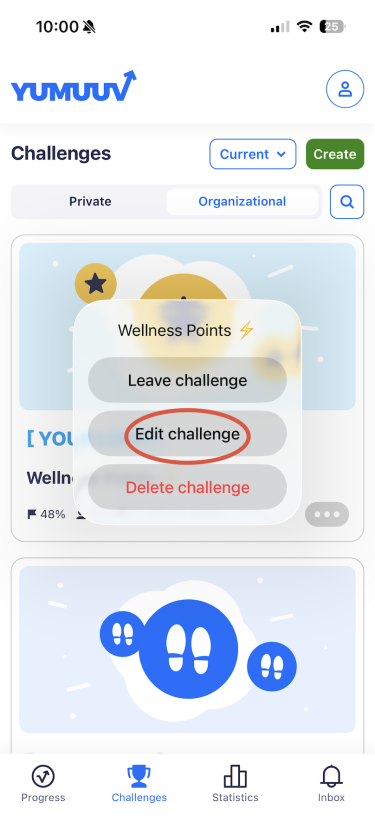
If you want to modify to the challenge later, click on the three dots next to the challenge and select Edit challenge.
If you have any problems with creating a challenge, contact us directly.